Setting up your Custom Color Templates
Posted by jonb - Nov 19, 2020 Overview, Getting Started, Custom, Content 0 1 Views : 3294 Receive Updates For This Category
Article Tools
- Print this page
- Add Comment
- Send to Friend
- Last Updated on :
Nov 19, 2020
The Custom Colors page allows you to further customize Mediplay Templates by selecting a primary and secondary color, corresponding text shade, and a background design. Once selected, your choices will be displayed within any Mediplay Template that has the “Custom Colors” background selected.
To get started, log into Mediplay Connect. In the top toolbar, hover over Administration, then select Custom Colors (available to primary user / subscriber admin only).
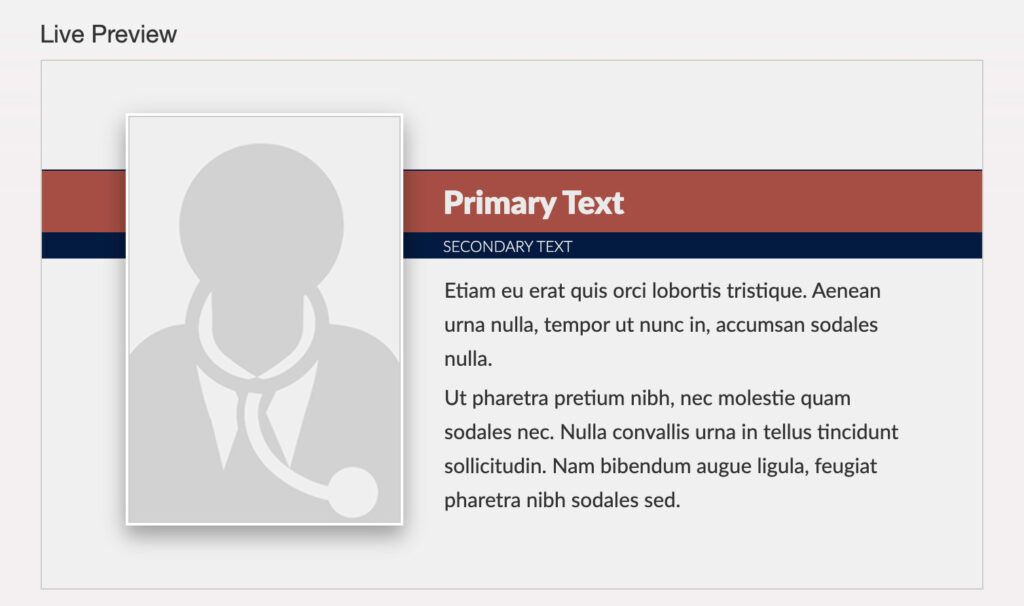
The Live Preview, located at the top of the page, will display your choices in real-time.
Step 1 – Choose Your Primary and Secondary Colors
You have the option of either selecting the colors manually, via a color wheel, or selecting the colors directly from an image (ex. your company logo). Both methods are detailed below.
Select from Color Wheel:
a. With the Primary Color radio button selected, click on a color from the outside color wheel, then fine-tune the color saturation by clicking the colored square located inside the color wheel. Repeat these steps for both the Primary and Secondary Colors.
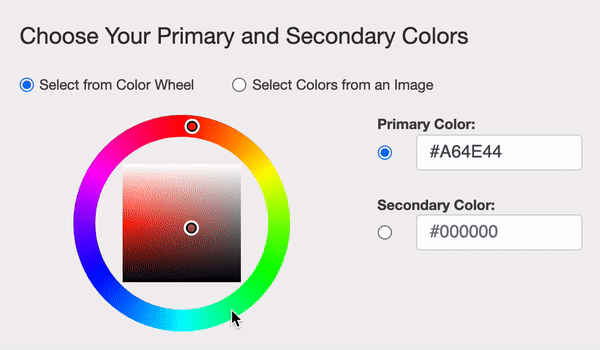
b. Select the appropriate text shade for both the Primary and Secondary color. Use the Live Preview to verify the text is easy to read.
Select Colors from an Image:
a. Click “Choose File”. Select and upload an image from your computer.
b. With the Primary Color radio button selected, use your mouse to click and select a color from within the image preview. Repeat this process for the Secondary Color. See example below.
c. . Select the appropriate text shade for both the Primary and Secondary color. Use the Live Preview to verify the text is easy to read.
Step 2 – Choose Your Background Design
a. Select your preferred background design, using the Live preview see the complete design put together.
Step 3 – Review and Save
a. Review your selections in the Live Preview to verify the colors are correct and the text is legible.
b. Once confirmed, click “Save”.
c. A notification will appear informing you that the changes made on this page will be applied network-wide. Click “Yes, Update Custom Colors” to confirm and apply your selections.
To make future changes, simply update this page and re-save. As always, any changes will be applied network-wide.
Related Posts
-
Why am I unable to preview custom messages in Safari?
December, 19 2018 0